PPF Installation Guide for Professional Installers
Published: July 4, 2026 · 12 min read · Category: PPF Installation
About this article: KSB Window Film supplies PPF to professional installation businesses globally. This guide is for installers who want to understand the material science behind installation best practices — not just the steps, but why the steps matter.
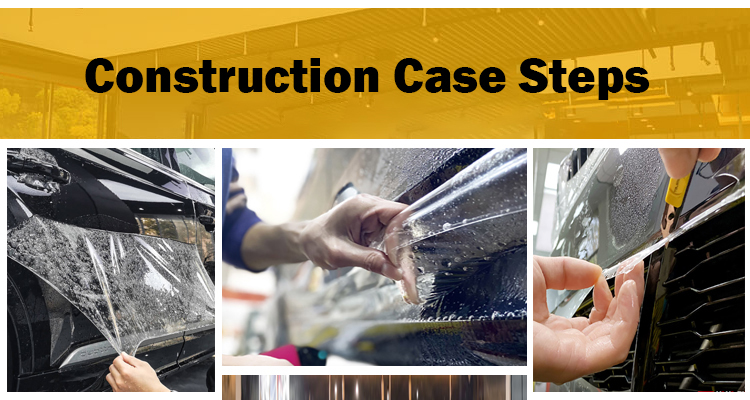
Paint protection film (PPF) installation steps on vehicle surface
Most PPF installation guides read like a product manual: do this, then this, then this. They’re not wrong, but they don’t explain why, which means installers following them mechanically make the same mistakes repeatedly without understanding what they did wrong.
This guide takes a different approach. We’ll cover the steps, but we’ll focus on what’s actually happening to the film, adhesive, and paint at each stage — because an installer who understands the material behaves more reliably on difficult panels than one who’s memorized a procedure.
Before You Touch the Film: Surface Preparation
Installers who skip or rush surface preparation cause more PPF warranty claims than any other single factor. This is not controversial — it’s documented in every serious PPF training programme. And yet it’s the step most commonly rushed when a shop is busy.
The PPF adhesive bonds to the paint surface. Whatever is between the adhesive and the paint — wax, silicone, road grime, detailing products — becomes the weakest link in that bond. The film doesn’t fail; the contamination does. The failure looks like a PPF edge lifting or an adhesion bubble; the cause is paint contamination six months before the visible symptom.
What “clean” actually means:
Not washing the car. Not wiping it with IPA. Proper decontamination for PPF involves removing:
Iron contamination: Brake dust, rail dust, industrial fallout deposits as iron oxide particles on paint surfaces. They’re essentially welded to the clear coat by oxidation and don’t come off in a car wash. Iron remover (pH-neutral iron fallout remover) applied before washing is the correct approach. You’ll see the product turn purple as it reacts with iron particles.
Bonded contamination: Tree sap, bird dropping residue, water spot minerals, road tar. Clay bar or clay mitt after washing. Physical abrasive decontamination is the only way to remove bonded contamination that doesn’t come off chemically.
Chemical contamination: Silicone from spray detailers, wax from previous ceramic coatings, tyre dressing overspray. IPA (isopropyl alcohol, 70–91%) panel wipe after claying. Do this at the point of installation, not days before — contamination redeposits from the air and from the installer’s own hands.
Paint correction: PPF goes over existing surface condition. Swirl marks, light scratches, and oxidation will be preserved forever under the film. A customer who pays for PPF and later discovers imperfections under it doesn’t care that the film wasn’t supposed to fix them. The conversation before installation should explicitly set expectations: we’re protecting from this point forward. If they want paint correction first, that’s a separate service.
Environment and Temperature
PPF adhesive is a PSA (pressure-sensitive adhesive) whose tack and flow properties are temperature-dependent. Outside the installation temperature window, it doesn’t behave as the manufacturer designed it to.
Minimum installation temperature: Most quality PPF adhesive systems specify minimum 16–18°C glass surface temperature. Below this, the adhesive is too viscous to flow and wet out the paint surface completely. It looks fine on day one — the mechanical pressure of squeegee application forces initial contact. But the adhesive hasn’t fully wet the surface, creating microscopic adhesion voids that become visible as bubbles within weeks.
Maximum installation temperature: Above 30–35°C ambient, the adhesive working window shortens dramatically. Slip solution evaporates faster. The film activates and bonds before you’re ready. Hot workshops create rushed installations with more defects.
The humidity factor: In very high humidity environments (Southeast Asian climates, UK winter with condensation), moisture can interfere with adhesive activation. Pre-warm the vehicle in a dry environment when ambient humidity is above 80%.
Practical note: In countries where installations happen in unheated garages in winter (UK, Canada, Northern US), the car must be brought inside and allowed to reach ambient temperature throughout — not just on the surface. A car that’s been parked outside in 2°C weather and driven into a 20°C workshop still has cold glass and cold panels for 30–45 minutes. Installing immediately leads to adhesion problems that appear weeks later when the weather warms up.
Working With the Film: What the Adhesive Is Doing
PDLC smart film and PPF both use PSA systems, but PPF has the additional complexity of being cut and stretched to shape on a three-dimensional surface. Understanding the adhesive behaviour at each stage helps avoid the most common installation errors.
The working window: After the slip solution is applied and the film is placed, you have a defined period (typically 30–90 seconds for most PPF systems) before the adhesive engages sufficiently to resist repositioning. This window exists because the slip solution — primarily water with a small amount of baby shampoo or commercial slip agent — occupies the adhesive-glass interface, preventing contact. As the solution evaporates or is squeegeed out, adhesion engages progressively.
The working window isn’t binary — it’s a gradient. You don’t have full repositionability one second and zero repositionability the next. The last 15–20 seconds of the working window allow small adjustments but not large repositioning. This is why large, complex panels need to be positioned correctly from the first placement — not corrected repeatedly within the window.
Heat and adhesive activation: When you apply heat to PPF during installation — for conforming to curves or tacking edges — you’re doing two things: increasing the film’s elasticity (helping it stretch without stress whitening) and accelerating adhesive cure. Excessive heat applied too early locks the film into a position before you’ve finished working it. Insufficient heat leaves the film fighting its own memory tension on complex curves.
The sweet spot: a heat gun at 40–50°C glass surface temperature for stretching and forming. Don’t aim the gun at the adhesive side (you’re heating the film’s body to increase elasticity, not primarily heating the adhesive). Keep the gun moving — stationary heat at high temperature creates stress whitening that doesn’t resolve.
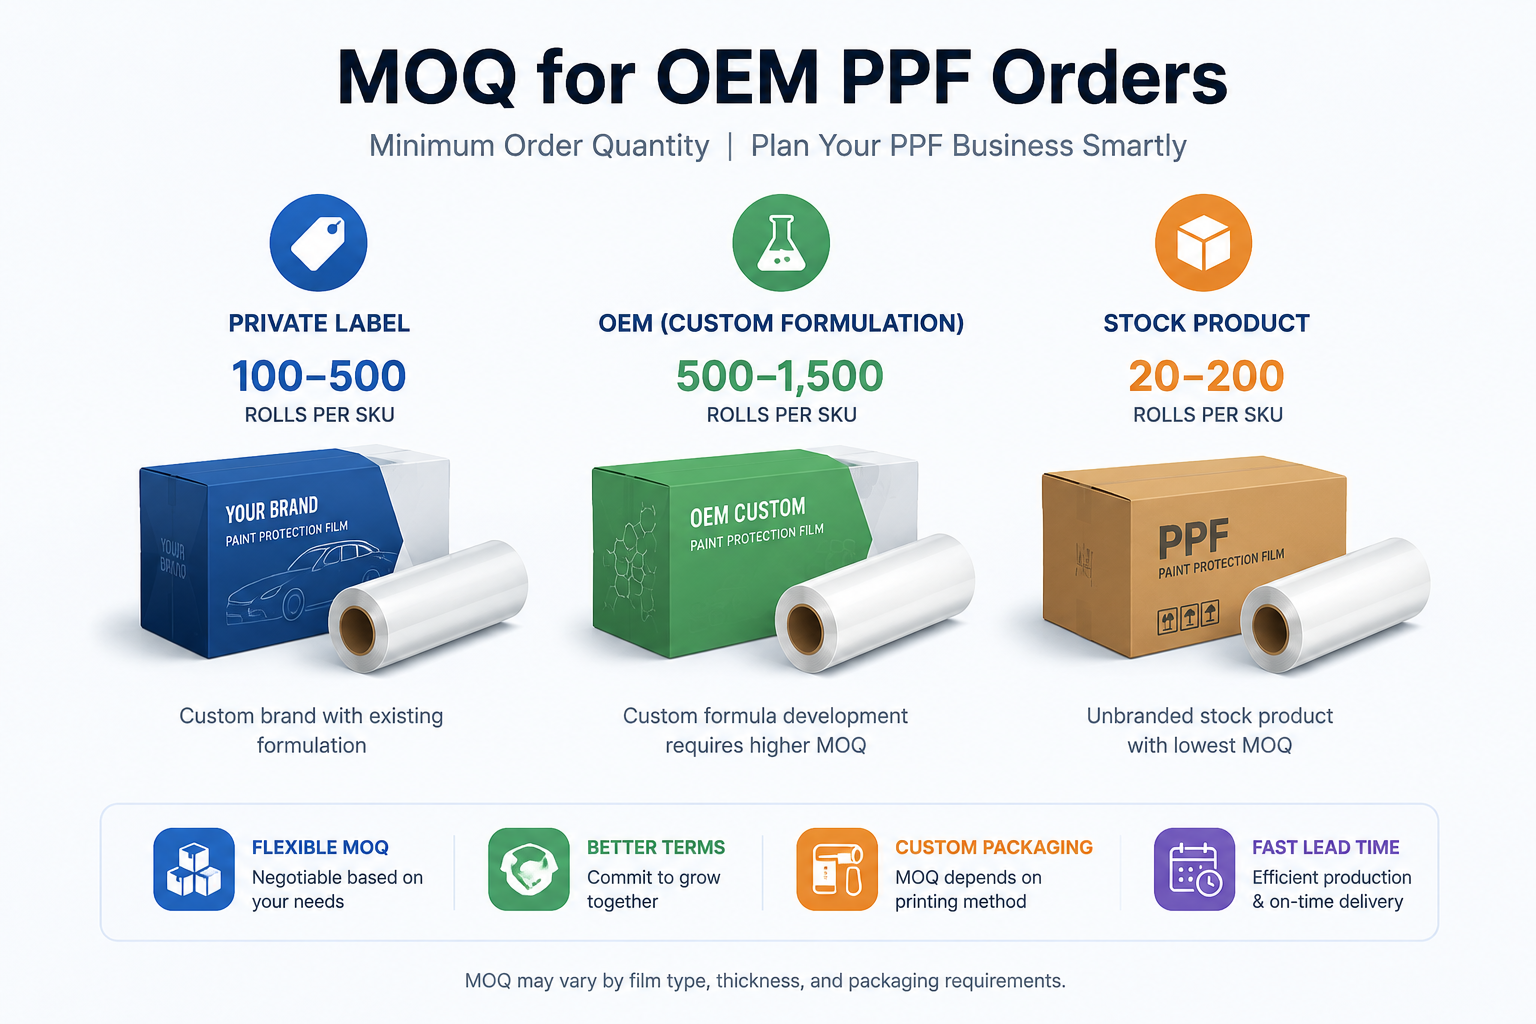
Pre-Cut Kits vs. Bulk Roll: The Trade-Offs
The window film industry has split significantly on this over the last decade: pre-cut kits (computer-plotted patterns for specific vehicle models, cut on a plotter and assembled into a set) vs. bulk roll (installer hand-cuts or patterns each panel).
Pre-cut kit advantages:
Consistent panel size and edge placement, reducing training variance
Faster installation on vehicles for which kits exist
Edge-to-edge coverage with tucked edges on most common panels
Lower skill ceiling for new installers on standard coverage packages
Pre-cut kit disadvantages:
Pattern database coverage isn’t complete — older vehicles, low-volume models, and newly released vehicles may not have kits
Kit-based work doesn’t develop the fundamental skills needed for complex full-body installations
Pattern updates when new model years are released require database subscriptions
Bulk roll advantages:
Any vehicle, any coverage, any edge treatment
Installers who can work in bulk roll are more versatile
No pattern subscription costs
Bulk roll disadvantages:
Higher skill requirement
More material waste
Longer installation time on standard vehicles
Most professional installations today use kits for standard partial-coverage jobs and bulk roll for full-body or bespoke coverage. The skills aren’t mutually exclusive — good installers can do both.
The Edges: Where Most Failures Start
Edge treatment is where PPF installation is most unforgiving. Poorly finished edges are the primary sites of lifting, edge oxidation, and customer dissatisfaction.
Wrapped edges vs. surface cuts:
Wrapped edges (film wrapped around the edge of the panel, tucked behind bodywork or trim): the gold standard for permanent, clean installation. No exposed edge means no adhesive edge to lift, no moisture infiltration point, no visible film termination. The challenge: not every panel geometry allows wrapping. Hood leading edges, side mirror edges, and bumper edges require dissassembly or creative tucking to wrap.
Surface cuts (film trimmed short of the panel edge, terminated on the paint surface): faster to install, doesn’t require trim removal, but creates a visible seam and an adhesive edge that’s exposed to uplift forces and moisture. For partial coverage where wrapped edges aren’t achievable, surface cuts are acceptable. They need a bead of edge sealant applied at installation to reduce moisture infiltration.
The cutting technique:
Surface cuts on the vehicle require a sharp blade at low angle, consistent pressure, and no hesitation — a pause mid-cut creates a ragged edge that’s visually obvious. Most experienced installers use a dedicated PPF cutting tool (knifeless tape or a mechanical guide) rather than freehand blade cutting, particularly for long straight edges.
The temptation to trim to the absolute panel edge creates two problems: leaving film too close to panel edges allows the film to be clipped and start lifting; leaving film on the paint gives the adhesive insufficient contact area to resist lifting forces.
Edge sealing:
Regardless of installation type, a bead of silicone edge sealer (compatible with PPF, not the silicone used for windscreen installation) along all exposed edge terminations reduces moisture infiltration. This is standard practice in high-humidity markets; it’s good practice everywhere.
Post-Installation: The Cure Cycle
PPF adhesive continues to cure for 48–72 hours after installation. During this time:
The film is vulnerable. Wet the car, put it in a car wash, or park it in rain — and water can infiltrate under edges that haven’t fully bonded. A customer who takes their freshly-installed PPF car through a drive-through car wash 6 hours after installation and then returns with lifting edges hasn’t been managed properly.
Bubbles from installation water: Small water pockets from the slip solution are normal immediately after installation. They resolve as water migrates through the semi-permeable film or evaporates from edges. Bubbles that haven’t resolved after 7 days in warm conditions warrant investigation — they indicate either an adhesion void (contamination issue) or a trapped gas pocket from a different source.
Temperature for cure: The adhesive cure rate approximately doubles with every 10°C temperature increase. Storing a freshly installed vehicle in a heated garage (25–30°C) for 48 hours achieves full cure faster than leaving it outside at 10°C. In winter climates, remind customers to keep the vehicle in a garage or heated space for the first 48 hours.
First wash: Recommend waiting 5–7 days for the first wash. After that: hand wash with pH-neutral soap preferred. No high-pressure washing directly at film edges for the first month.
Common Installation Defects and Their Causes
Defect
Most likely cause
Can it be fixed?
Water bubbles post-installation
Normal — slip solution, resolves in days
Yes, wait
Bubbles after 2+ weeks
Adhesion void (contamination)
Usually not without re-installation
Stress whitening
Film over-stretched without sufficient heat
Sometimes — reheat gently
Edge lifting within 6 months
Contaminated surface, inadequate preparation
Spot re-installation
Edge lifting 12+ months
Adhesive quality, temperature cycling
Product and installation review
Visible film edge on surface cut
Cut too far from edge, or excess overlap
Trim adjustment
Cloudy/hazy appearance
Adhesive contamination, wrong cleaning products
May clear; may require removal
Film won’t conform to curve
Film too cold, insufficient heat, wrong film for curve radius
Increase heat, work more slowly
FAQ
A customer wants PPF installed over a ceramic coating. Should we?
PPF adhesion to ceramic coatings is acceptable for most quality coatings but varies with ceramic product. Some high-hardness ceramic coatings create surfaces that PPF PSA doesn’t bond to as effectively as it does to automotive clear coat. Request the ceramic coating product name and check with your PPF manufacturer for compatibility data. If in doubt: test a small panel and check adhesion after 72 hours before committing to a full installation.
How do I remove PPF that’s been on a car for 5+ years?
Heat is the tool. A heat gun at 60°C glass surface temperature applied to the film surface for 30–60 seconds softens the adhesive and allows the film to be removed by peeling at a slow, consistent pace. Pulling quickly or pulling cold risks breaking the film and leaving adhesive on the paint. After removal, any adhesive residue on the paint can usually be removed with IPA, a dedicated adhesive remover, or a clay bar. Never scrape with a blade on clear coat — you’ll need paint correction to remove the scratches.
KSB Window Film’s PPF is manufactured with consistent working window behaviour, documented haze below 0.4%, and compound-curve conformability built into our product testing programme. Samples available for installation testing before commercial commitment.